


‘Paradise is just a paddle away!’
Not every kayak adventure can take place in balmy weather and glassy waters. When cooler conditions prevail, you’ll want a spray skirt for your sit-in kayak. Fortunately, they aren’t all that complicated. Here’s what you need to know when choosing a spray skirt for your kayak:
- When you need a spray skirt: Your comfort is key.
- Parts and materials: Learn the pros and cons of neoprene vs. nylon.
- A few key features: Shoulder straps and pockets can improve fit and convenience.
- How to get the right fit: You’ll need to make sure the spray skirt fits both you and your boat.
When You Need a Spray Skirt
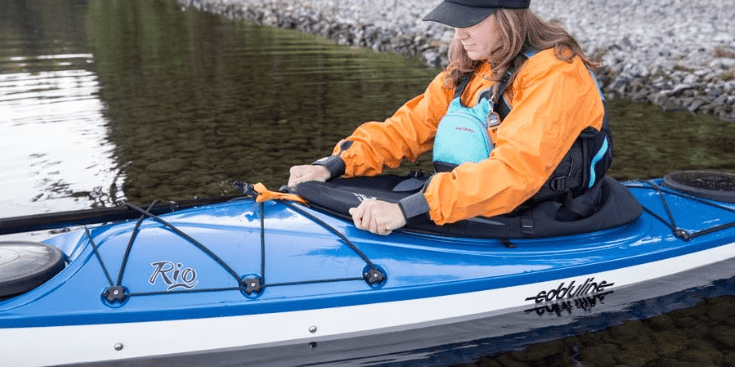
When air and water are warm, you may be more comfortable without a spray skirt because it can make things a little stuffy inside your sit-in kayak. If the water is very choppy, though, you’ll want a spray skirt because waves washing over the deck could destabilize and eventually swamp your boa
When the air and water are cold, a spray skirt helps create a warm environment inside the boat, and it keeps out rain and splashes.
Note that a spray skirt is there to increase your comfort level, not to save you from hypothermia in the event of a capsize. For more info about which piece of clothing is suitable for you, send us a message or check our our clothing section here.
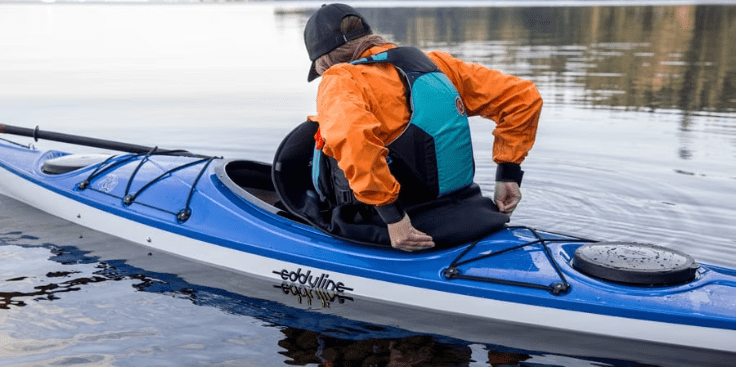
Spray Skirt Parts and Materials
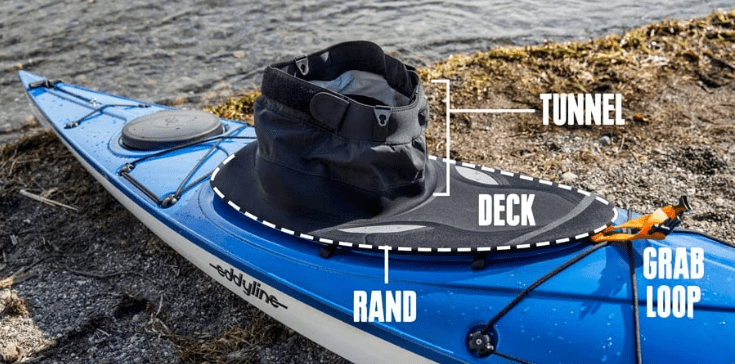
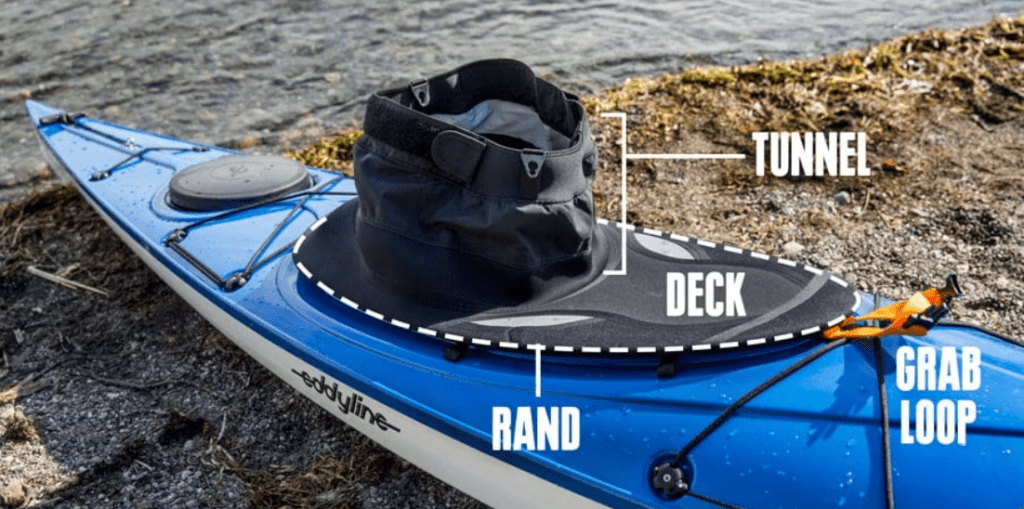
Anatomy of a spray skirt: Spray skirts are made up of a tunnel, a deck and a rand. The tunnel is worn around the paddler’s torso. The deck is the skirt portion that radiates out from the tunnel to cover the boat’s cockpit. The rand, or the edge of the spray skirt, holds the deck taut by fastening over the cockpit coaming (the lip of the cockpit).
Spray Skirt Materials
Neoprene: This rugged material provides warmth when the air and water are bitterly cold. Neoprene skirts have rubber or neoprene rands that grip the cockpit coaming firmly, so the skirts can withstand the force of breaking waves or rolling a kayak. That’s a plus for both whitewater and sea kayaking in extreme conditions.
Because of its tight seal, a neoprene skirt is difficult to remove during a wet exit, so it’s important to practice your skirt-removal technique if you’ve never used a neoprene skirt before.
All-neoprene skirts have neoprene tunnels that fit snugly around your torso to seal out water there.
Nylon: All-nylon skirts will be more comfortable in moderate conditions. The nylon can be fully waterproof, waterproof/breathable or highly water resistant. The rand is often a bungee cord that provides a snug seal, but won’t keep out water in a capsize.
Nylon decks are easier to attach and release than neoprene, but they don’t create the tight seal needed for very rough water that neoprene decks do.
Nylon tunnels might have a spandex waistband or an adjustable fit via a drawcord or hook-and-loop fasteners. This design makes for easy venting of the cockpit but not a watertight seal at the torso. Many also have shoulder straps to hold the tunnel up.
Nylon/Neoprene: This combines the venting comfort of a nylon tunnel with the super tight seal of a neoprene deck. This design is good when conditions are variable, with the prospect of waves developing during the day.
Spray Skirt Features
These extra features can improve performance and convenience:
- Shoulder straps: Their biggest benefit is helping to keep the tunnel fully extended to prevent water from pooling at the base of the tunnel.
- Tensioned deck stay: Helps keep a nylon deck taut and prevent water from pooling on it.
- Pockets (Interior and exterior): These are handy for stashing essentials like sunscreen, insect repellent and snacks. Pockets can be on the deck or the tunnel. Mesh pockets drain quickly, and zipper and hook-and-loop pocket closures hold things securely. Fleece-lined pockets can help you warm up cold hands.
Special Types of Spray Skirts
Splash decks: Appropriate for calm water and warm weather, this type of spray skirt attaches to the front of the cockpit to keep the paddle from dripping water onto your legs. Because it doesn’t cover the whole opening, it allows air to freely circulate within the cockpit to keep you cooler.
Tandem kayak spray skirt: This fits a two-person boat that has a single open cockpit. The skirt comes in two pieces, each with its own grab loop. The pieces then fasten together in the center to create a single spray skirt that covers the overall cockpit. A tandem boat with two separate cockpits requires individual spray skirts.
How to Get the Right Fit
Cockpit fit: With so many cockpit sizes and shapes, a one-size-fits all skirt is not an option. Fortunately, spray skirt manufacturers have done the hard work, and have created elaborate sizing charts for you. You don’t need to measure your cockpit, but you do need to know the brand and model name of your kayak.
If you can’t find your model in a sizing chart, then consider a custom-made skirt. Contact spray skirt manufacturers, local paddling shops and paddling clubs to see what they recommend.
Torso fit: Nylon tunnels typically have an adjustable one-size-fits-all design. If you get a skirt with a neoprene tunnel, though, you need to measure the circumference of your “midriff” (the tunnel top sits higher than your waist, but below your chest). Then use that measurement and a skirt’s tunnel sizing chart to pick your tunnel size.
Tips for putting on your spray skirt:
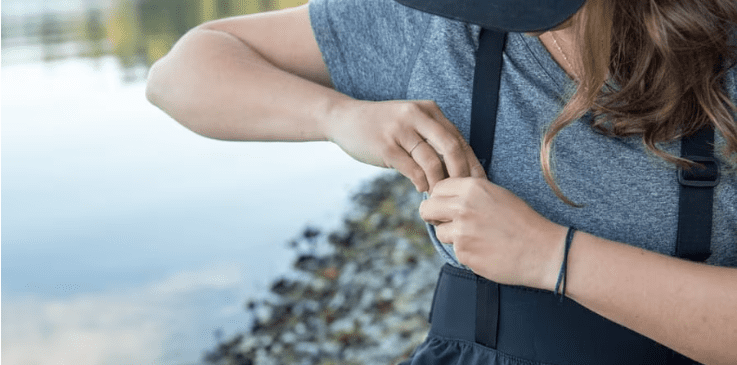
- To get a good fit at the waist, put on your spray skirt before you don your PFD.
- When attaching your skirt to your boat, start behind you. Slip the rand edge underneath the coaming at the rear of the cockpit. Hold it firmly there as you work your way around to the front of the cockpit, slipping the remaining rand edge under the coaming as you go.
- If your spray skirt has shoulder straps, readjust them after attaching the skirt rand to the cockpit. The goal is to ensure you have a taut deck surface.
- Always double-check that the grab loop is on the outside. In a capsize, you need to be able to instantly find and yank the loop to release the skirt.
Cited from: https://www.rei.com/learn/expert-advice/spray-skirt.html
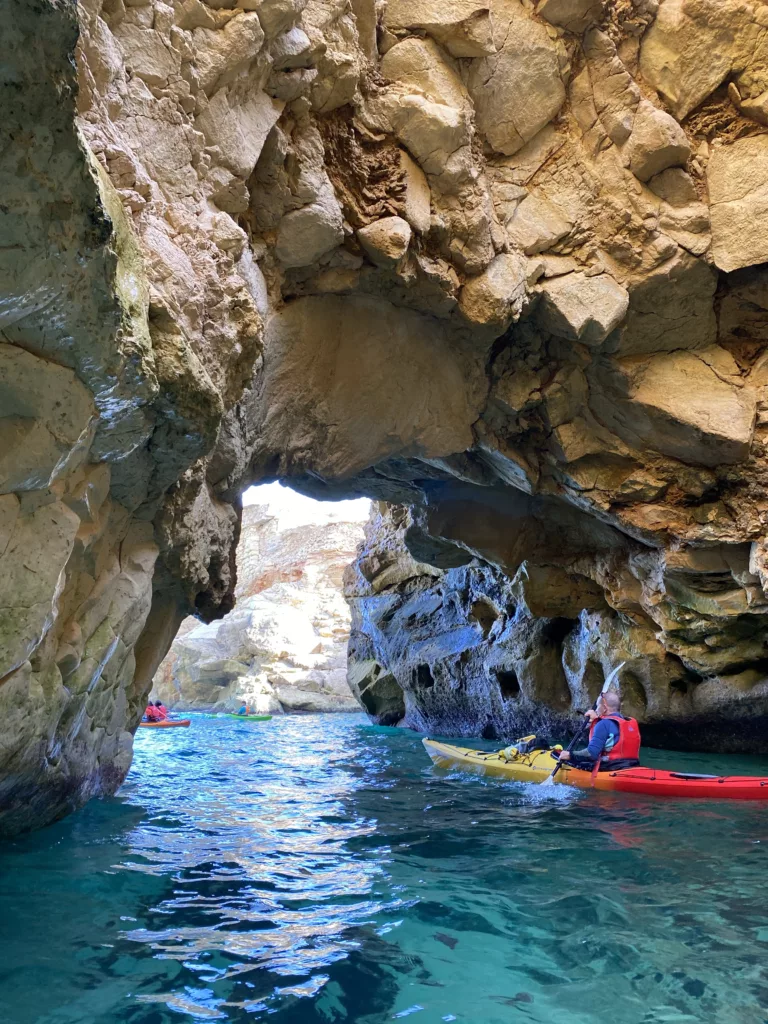
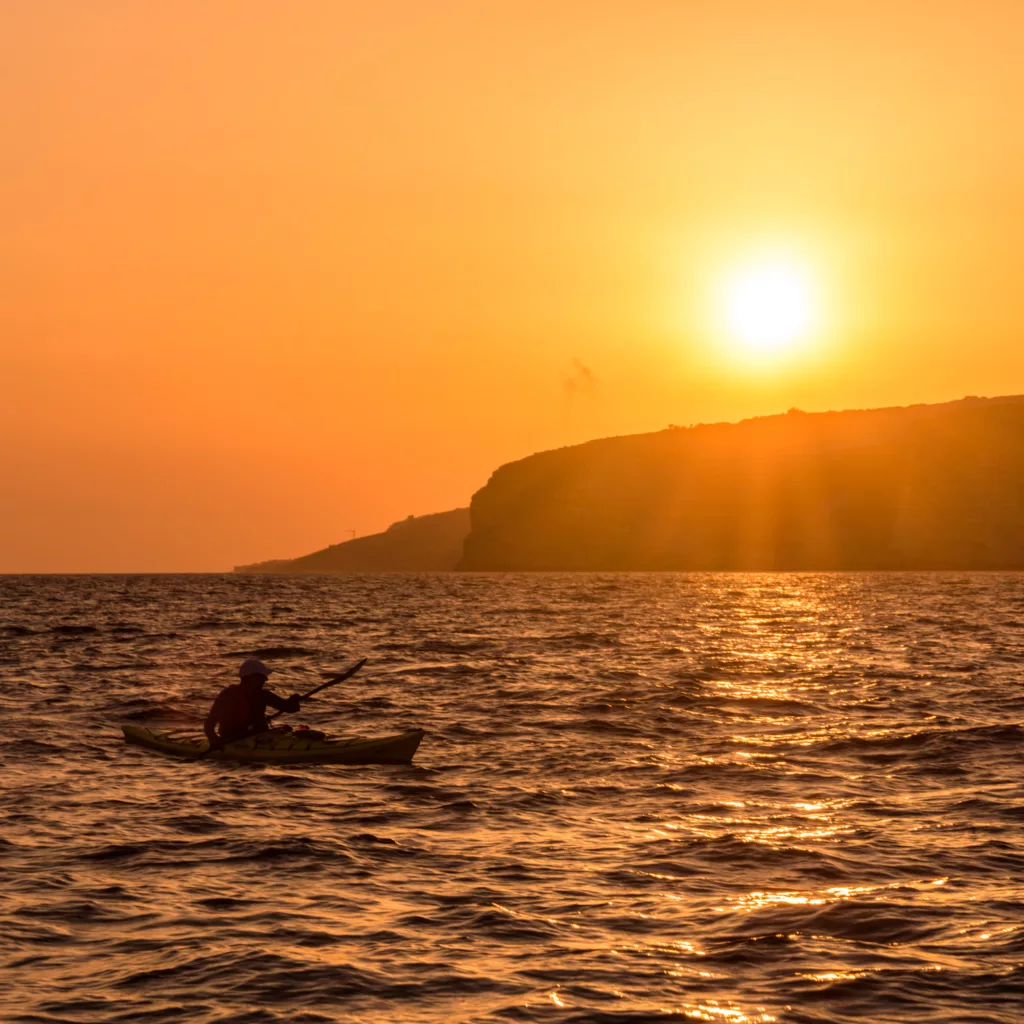
Malta is arguably one of the nicest places to kayak. The pristine coastline and crystal clear waters of the Mediterranean sea offer a unique blend of natural beauty and man-made architecture with historical significance which makes Kayaking in Malta and Gozo a must. Paddle along beautiful beaches, rocky cliff faces, under natural rock formations, inside caves or along century old bastions used during the war – the choice is yours!
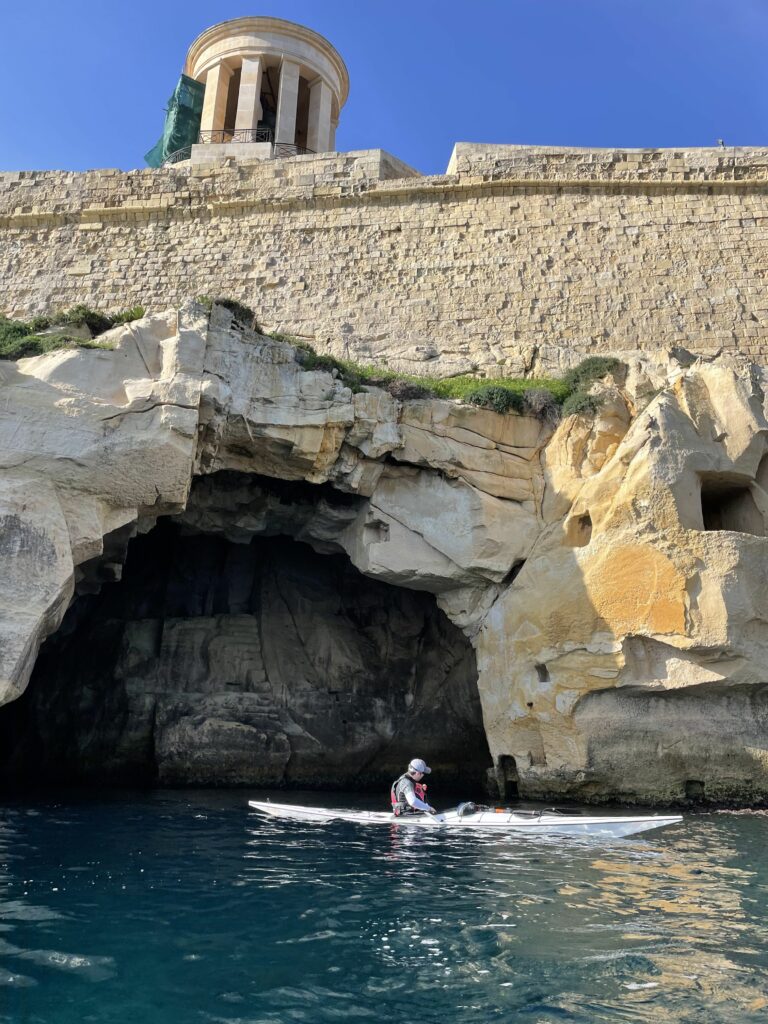
The photo above shows the magnificent Zegul Greenland T exiting the Great Siege Bell Memorial cave in Valletta during one of the Malta Paddlers events.
Malta is only 27km long by 14.5km wide is tiny by most standards, however the coastline exploration is never ending! Kayakers who have been kayaking for over 30 years keep finding new spots they’ve never seen before, new caves and new view points!
The temperature in Malta generally ranges from 8°C in the coldest months to 31°C in the warmer summer months. These are ideal temperatures for all-year round kayaking. Technical clothing is highly recommended to protect against the sun throughout summer.
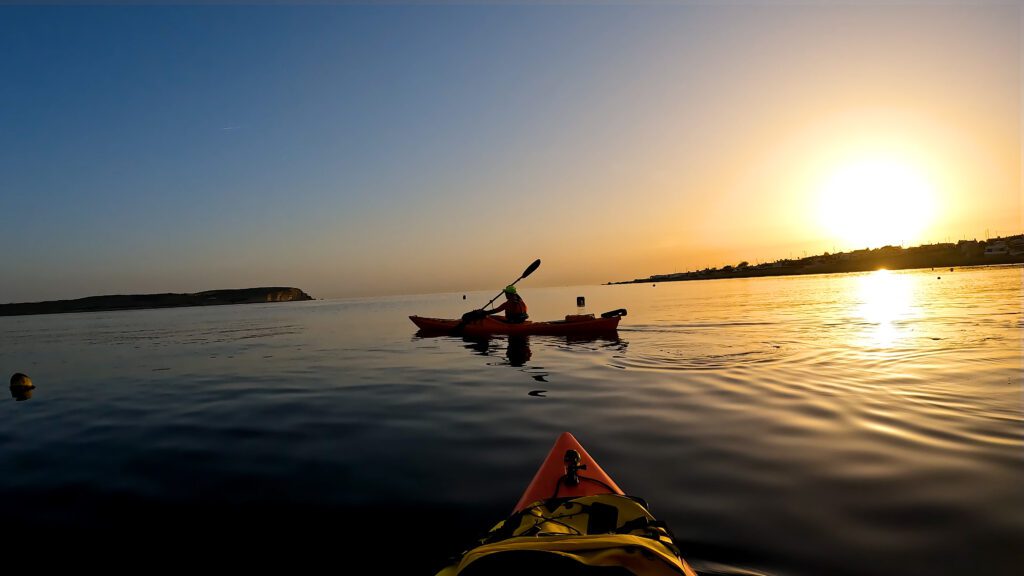
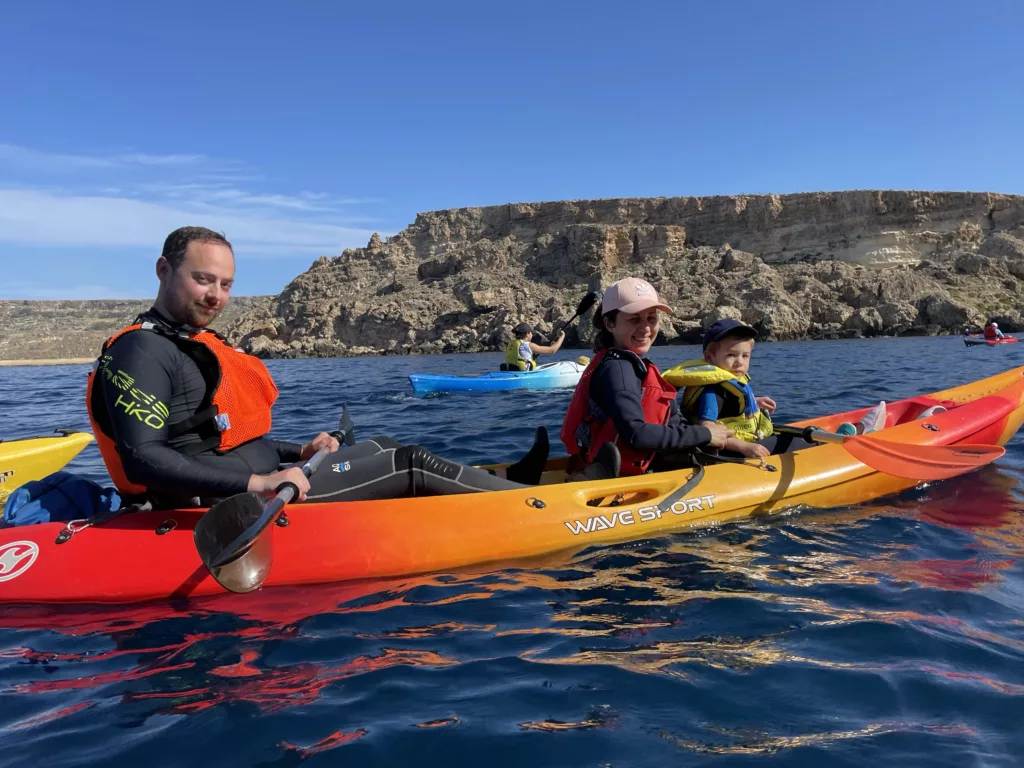
Enjoy a few more pictures taken by Malcolm Manduca of Zegul kayaks exploring in Malta.
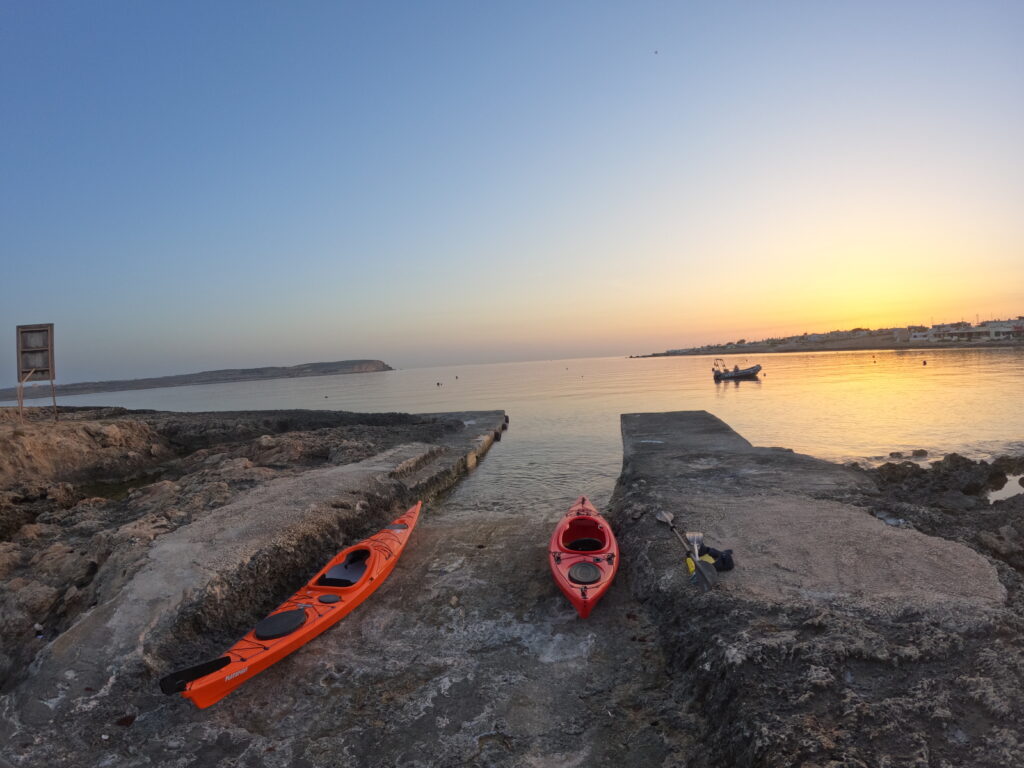
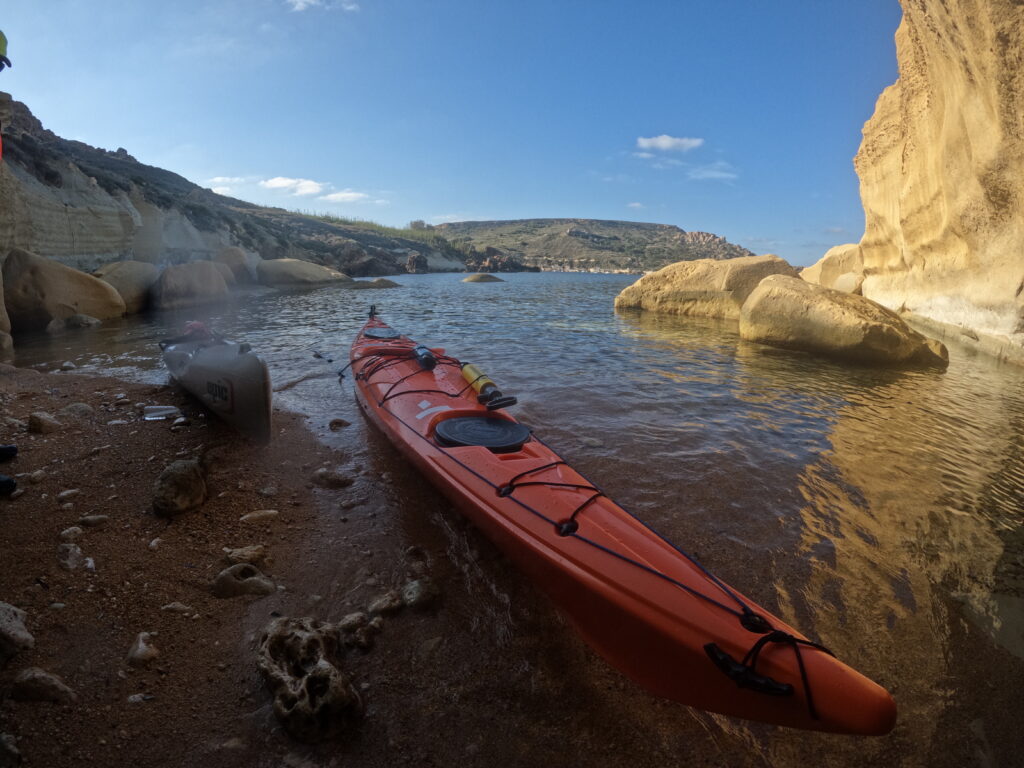
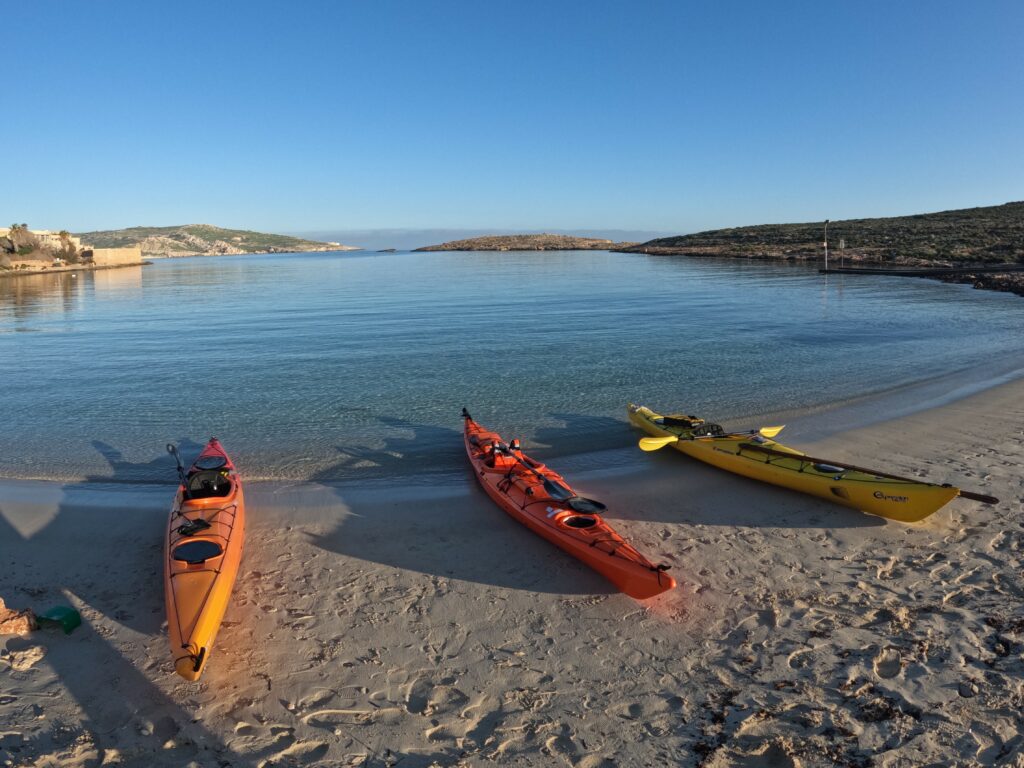
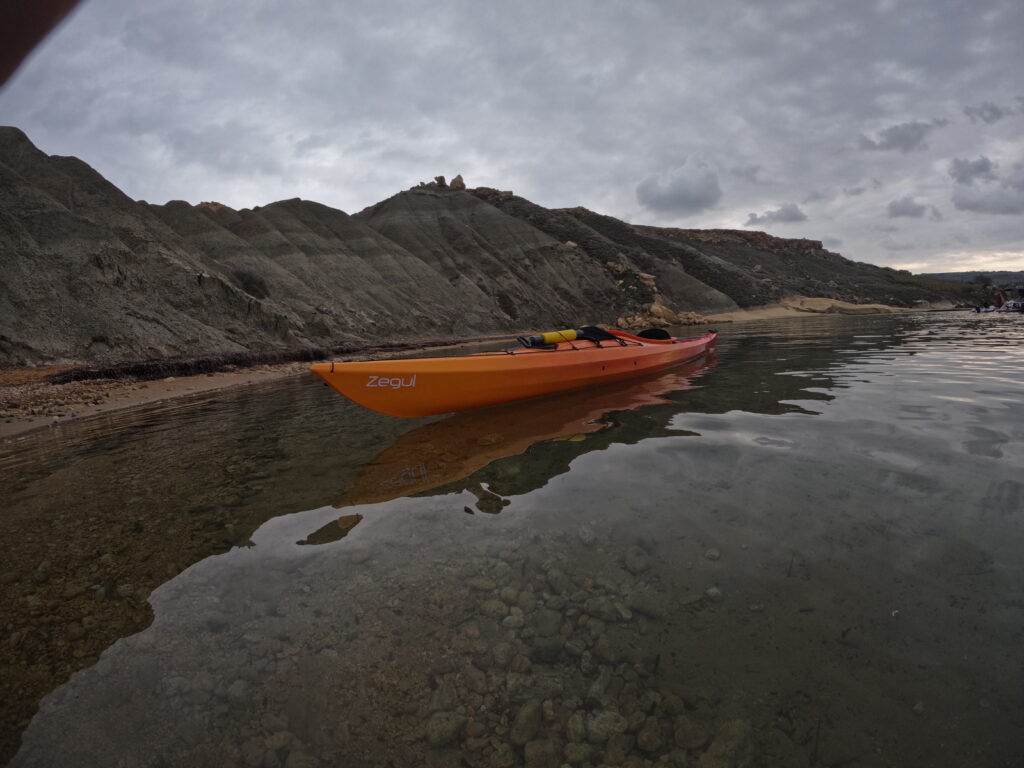
The images above were kindly sent to us by Malcolm Manduca. They were taken during his paddles with Ruben Lofaro and Charles Brincat (in the photo with three kayaks). Malcolm owns a Zegul Ormen MV (Skeg + Rudder) and Ruben is with his Tahe Marine/Zegul Playspirit and Epic V5.
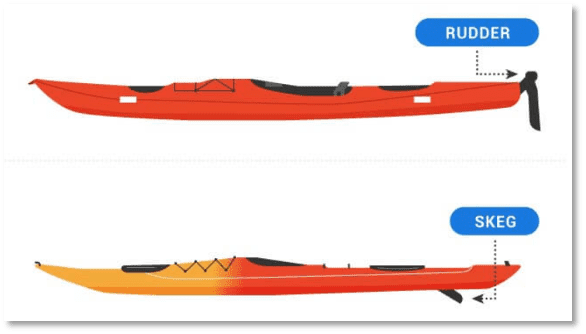
After over 40 years of kayaking in Malta we still regularly get caught up in the discussion especially with newbies on the advantages and disadvantages of skeg vs rudder or vice versa.
First of all a rudder or skeg is designed to aid in the steering of a kayak thereby minimizing the need to making continual correcting strokes that can cause fatigue and perhaps discomfort. There are however some key differences between the two.
So which one is best?
Brian Day from Paddling Magazine comes up with some clearly articulated arguments in favor of the skeg. He states that rudders are clearly helpful to beginners who are just getting the hang of paddling, but goes on to explain why rudders are a poor choice in a versatile sea kayak paddled in a full range of ocean conditions, from surf to tide races.
Rudders have one big problem (and some small ones) you just can’t get around. The real problem with rudders is trim (it is either up or down).
He goes on to explain (story adapted to Malta!): Imagine yourself kayaking off the shore of Armier. Olive trees (!) sway in the breeze and a steady wind pushes your boat toward the rocks. You start paddling forward, steering a course toward Comino… and your kayak begins turning into the wind.
What the heck is going on? It’s simple. If the wind blows you sideways, you’re going to drift sideways. If you start paddling forward, the bow of your kayak gets stuck in the water and the stern keeps on drifting sideways as the kayak will naturally want to turn into the wind. This is known as Wind-cocking (Figure A– no skeg deployed. Bow anchored into the sea due to forward movement but stern not anchored).
Now, if you are in a kayak with a skeg, you’ll want to slide that skeg down a little bit at a time until you can point at Comino again. That skeg mechanically changes the bow-to-stern trim of your kayak. In essence, it makes the stern sit deeper in the water and locks it in place, so it can’t skid out. (Figure B- Skeg partially deployed to counterbalance the bow anchoring and wind-cocking)
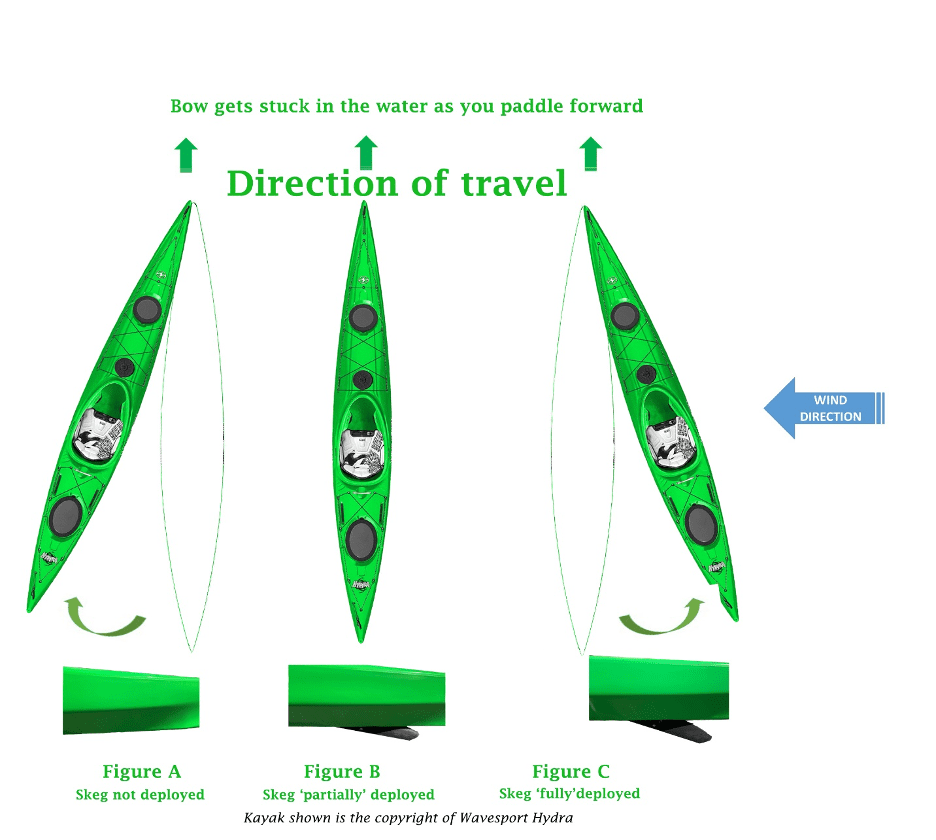
Here you are now, happily paddling along, pointed just where you want to go, skeg in perfect position. Great. What happens if you decide to push the skeg all the way down? Trouble. Why? Because if you put that skeg all the way down, your kayak will start to turn away from the wind. The trim will be too far toward the stern. You’ll start heading for certain destruction on the rocks of Comino! (Figure C – Skeg Fully deployed so no longer balancing the bow anchoring but creating even more drag so not allowing the kayak to turn from the stern)
With the skeg fully down you thrash away on the downwind side of the boat, desperately trying to claw off the fatal lee shore. To no avail. Slowly, inexorably, your bow points toward the pointy rocks. Your mind is filled with visions of smashed plastic or. Yikes. Better pull up the skeg a little bit. Wind-cocking fixed!
Now with a rudder you just can’t do that! They are either deployed or not deployed. This will mean leaning heavily on one foot pedal as you continuously attempt to steer in the correct direction. This will reduce the power you can deliver to the stroke cause by uneven leg bracing.
This brings us to another point mentioned frequently in favor of skegs, being that the solid foot pedal in kayaks with a skeg stay in place and support your feet and legs better. Since the foot pedal with rudder-equipped kayaks moves, even if only at the top, the foot support is not as strong and for some this is the biggest compromise of rudders.
In conclusion
Since rudders and skegs are really only useful for tracking over long distances, you generally don’t find them on shorter recreational kayaks, especially sit on top models. It is however important to look at the hull of the recreational kayaks, as round hulls will be particularly prone to wind-cocking in the wind and beginners or weekend kayakers may want to take note.
Over the last few years top kayak manufactures have recognized the growing popularity of skegs, and one can now find more and more mid-length models (11-13feet/ XM-YM) on the market with built-in adjustable skegs. These kayaks are generally called Hybrid Kayaks, as although shorter than touring kayaks they can track well over longer distances. Models with built in skegs will be costlier than those without- but this is usually one of the best investments you can make and will allow you to take your kayaking to the next level.
The key take out from the above is that rudders are very easy for beginners to understand and use but more experienced kayakers may not want to use them for the two reasons mentioned above (wind-cocking and solid foot bracing). Rudders just don’t do a good job at balancing a versatile kayak in the wind in a broad range of conditions.
There is still a place for rudders. They work great on both tandem kayaks and on specialized kayaks intended to be paddled with the rudder in the water at all times like surfskis and racing kayaks. If you have both a skeg and rudder on a touring kayak the rudder can be a great way of getting used to your kayak as a relative beginner following which you can transition to using only the skeg.
As the saying goes: ‘If you want to explore the sea in all its manifold dimensions whilst touring, stick with a skeg, and avoid rudders’.
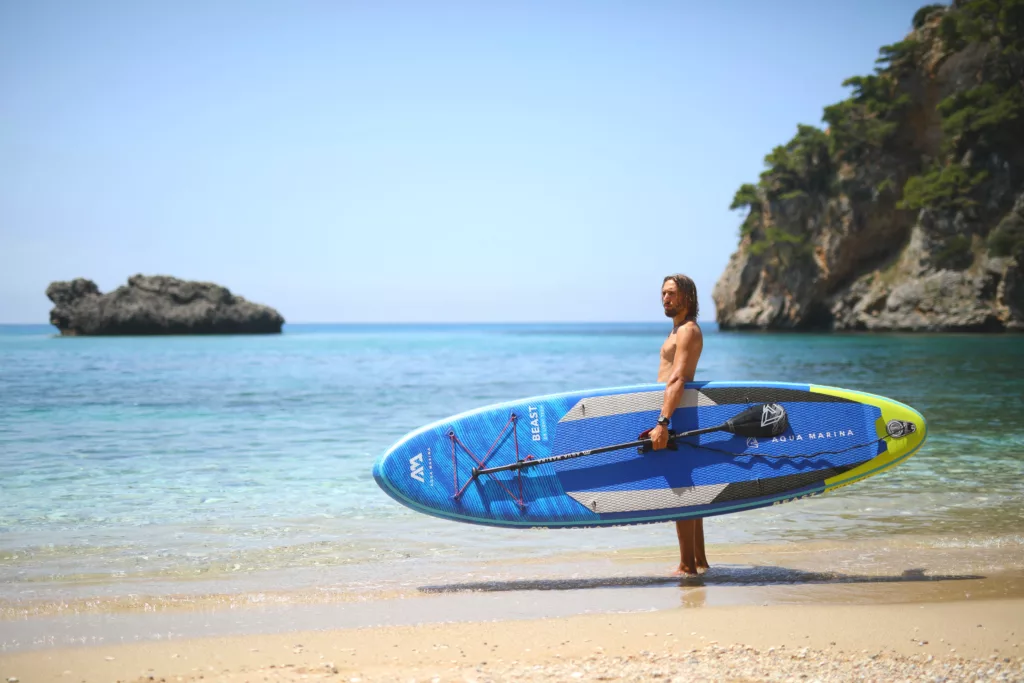
Stand up paddle boarding, or SUP for short is a very popular water sport and leisurely activity all around the world. It’s a fun and relaxing way to explore the outdoors and get a great workout at the same time. SUP can be done by people of all ages and fitness levels, and it’s a great way to enjoy the water while also improving your balance, core strength, and overall fitness.
Due to the increase of SUP boards in Malta, we get asked many of the same questions over and over again so we decided to list them down in this blog post. We will also be providing tips and tricks that we have learnt over the last 20 years of selling inflatable SUP boards.As you may know, we sell SUP boards from top brands Aqua Marina and Spinera. The following discussion is good for all iSUP brands.
Single Layer vs Double Layer Technology (DLT)
SUPs can be either made from single layer or double layer technology. For example, the Spinera Let’s Paddle series are all single layer, whereas the SUPVenture series are double layer.
Double Layer Technology (DLT) is the premium construction we use on our specialised boards which are much stiffer and more durable. It involves fusing a second layer of hard-wearing reinforced PVC to the Double Wall Fabric drop stitch core at the raw material stage, rather than hand gluing it. The high-tech industrial process could reduce 20%-25% in board weight by saving glue while making the boards stiffer. The disadvantage is that DLT is more expensive than single layer boards for reasons explained above.
Rider Weight vs Max Capacity
Arguably the most important thing when buying your SUP board is to buy the right SUP for you! We always guide our customers at our shop, however when buying online it can be quite tricky with all the different weight recommendations and SUP models available. First of all, the most important feature is how much weight the SUP can take and still perform well on the sea. This is read on the specifications on each SUP, however the confusion starts when different brands refer to Rider Weight or Max Capacity. These do not mean the same thing!
The recommended rider weight as found on Spinera specifications is an indication of the actual weight which the SUP can take and perform optimally on the sea. For example the Spinera SUPVenture 10 has a recommended rider weight of 95kg. This means that a person under 95kg will have the best experience on this board. Different boards have different recommended maximum rider weights, for example the Spinera SUPVenture 12 has a maximum recommended rider weight of 140kg. This means that the 12 foot version can cater for heavier paddlers. It also means that a person weighing 80kg will feel this board more stable than other smaller boards. The general rule is: The higher the maximum recommended rider weight, the more stable the SUP will be.
On the other hand, Aqua Marina do not provide the rider weight but only the maximum capacity of the boards. These values do not mean the same thing! For example, the Aqua Marina Magma has a maximum payload of 150kg. This does not mean that it can take a rider of 140kg. To convert maximum payload to rider wight we usually divide by 1.5. Therefore the recommended max. rider wight for this board is 100kg! (150/1.5 = 100kg)
How much should I inflate the SUP?
Each SUP has a recommended maximum pressure which is usually 15 PSI. The maximum we recommend inflating to is 14PSI. In temperatures over 25 degrees Celcius, we recommend inflating the SUP between 80% to 90% of the max pressure. This amounts to 12-13PSI. This is because the air pressure will increase naturally due to the heat.
How should I store my board?
- Remove fins before you store your board.
- Completely dry your board BEFORE you store it.
- Don’t store your inflatable board in direct sunlight. This will result in deterioration in the long run and shorten the life of your board. UV radiation is harsh and can particularly damage PVC when exposed repeatedly day after day.
- Store your inflatable board in the right temperature range. Anywhere between 5-30 degrees Celsius is recommended. Again, inflatable SUPs are durable, but extreme conditions aren’t ideal for any sporting equipment. Avoid freezing cold or baking hot conditions.
- You can store your board both deflated or inflated, whichever suits your space.
- When the board is stored inflated, resist the temptation to stack things or place heavy objects on it. This could cause a divot or impact the rocker of your board over time. Also, if you’re storing your board inflated for the long-term, it’s best to release a few PSI just in case your storage area gets too warm. That helps to prevent any damage to the board from the air inside expanding beyond the desired PSI.
- If you store your board deflated, keep it lying flat. When storing your board deflated, it’s a great idea to use your board bag to protect it from abrasions. Make sure it’s rolled or folded loosely. Then store your board in it’s backpack so it’s laying on its side rather than upright or standing on the edges of the board where pressure points could form.
Can I leave my board inflated in the sun or overnight?
No. Do not leave your board under direct sunlight as this may cause over-inflation. Please keep the board under shade when not in use with a working pressure NO MORE THAN 60%-70% of the maximum air pressure, or leave your board in a cool dry place. Remember to check the air pressure before and after use, and deflate your board when necessary.
How do I take care of my inflatable board? How do I maintain my board?
Taking care of your board is pretty easy with regular maintenance. Here are some handy tips that will ensure your gear lasts longer.
– Cleaning: Clean the board after each use with freshwater and mild soap.
– Keep it dry: Dry the board off after each use and before storing to avoid mould damage.
– Avoid direct sunlight: Keep the board away from direct sunlight and keep under shade when not in use with a working pressure less than 60%-70% of the max. air pressure.
– Don’t use an air compressor: You can easily over-inflate the board by using an air compressor and void the warranty.
– No dragging: Sharp debris can puncture your board.
– Use it frequently: Long-term storage can cause glue bonds to disintegrate.
– Store at room temperature: Keep the boards sheltered away from high temperature and humidity, with room temperature between 0℃ and 40℃.
– Regular maintenance: Regularly check for cracks, scrapes, or any other issues and repair if necessary.
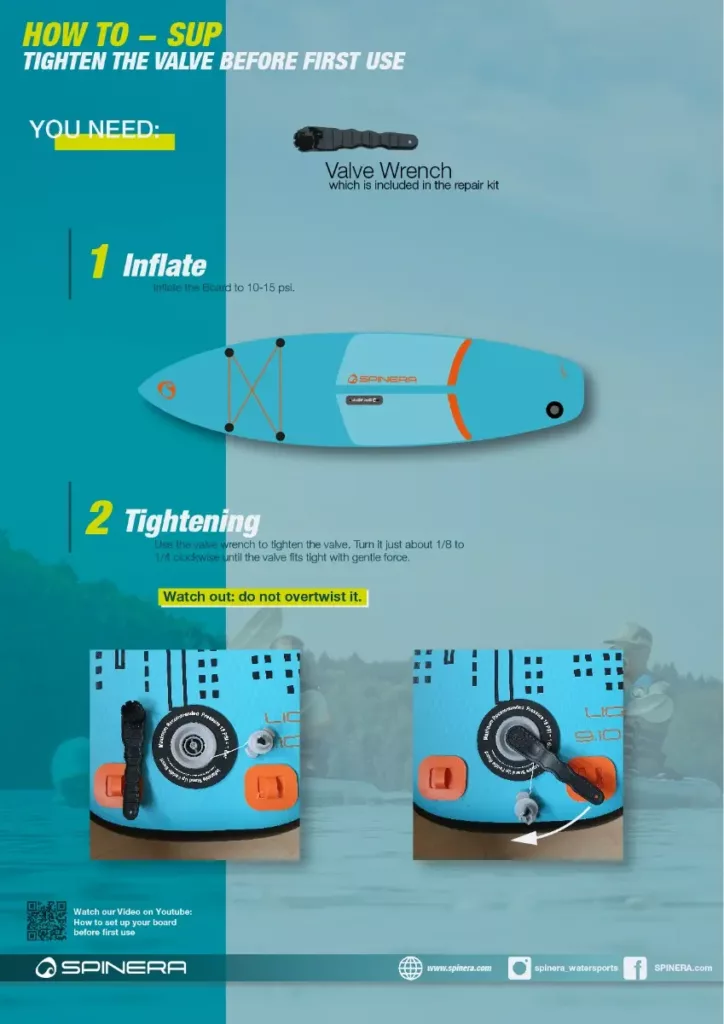
What to do if the Valve has loosened and leaking air?
Please use the supplied valve spanner to tighten the valve. The valve is a service point that must be tightened before first use and several times during the season to ensure 100% tightness.
Watch this video for more details.
There is a bubble at the back of my SUP, is this normal?
The bubble on the back end of the SUP’s is completely normal and results due to the insertion of the valve in the manufacturing process. When inserting the valve in the manufacturing process, the drop stitch threads must be taken out of this area to allow the valve to fit adequately. This results in the bubble on the back side. The bubble has no effect on the ride or glide characteristics and is present on every SUP.
Buying your own SUP
Based on the above information you should have a clearer idea of what to expect when you buy your new SUP. Get in touch with us or visit our shop so we can assist you further! We offer a 2 year warranty on all our products. It is very important to check that who you are buying your SUP from honours the warranty and can repair any issues which arise.
If you have any other questions please leave a comment below!
Proper kayak storage is crucial—yet often overlooked. Sure, calling it a day after a thrilling time in the great outdoors and putting your kayak away is not exciting, but it’s important (i.e., if you want to prolong the life of your precious kayak).
Failure to store your ‘yak properly leaves it susceptible to disgusting mildew/mold, scratches, and dents from contact with hard surfaces, or worse, warping of the plastic hull. But as anyone who’s ever owned the watercraft will tell you; kayaks are hard-to-store items! They’re often bulky, relatively delicate, and downright odd-shaped. And this is where kayak wall mounts come in.
Read on for more on why you should consider investing in a kayak wall mount and how to install it for proper storage of your trusted ‘yak.
Benefits of Kayak Wall Mounts
- Versatile: Storing your kayak in a tidy and economical way with wall mounts is great—but it doesn’t stop there! You can also store kites, windsurfs, surfboards, and other lightweight watercrafts. It’s a one-size-fits-all solution.
- Increase Air Flow: Suspending your kayak off a wall translates to increased airflow, away from dampness. This prevents the growth of mildew and mold, which can be a real headache—especially if your own a composite of a wooden kayak. For plastic kayaks that are vulnerable to warping from heat, it also helps regulate the temperature.
- Free up Valuable Storage Space: Walls are often the most underutilized storage space—whether it’s in the garage or the kitchen. Rather than taking up a substantial amount of real estate by storing your kayak on the floor, save that space for something else by mounting it. This is both functional and aesthetically appealing.
- Even Weight Distribution: Few things are as disheartening as going into storage only to find a deformed remnant of your good ol’ kayak. Luckily, wall mounts cradle and distribute the weight of your kayak evenly—preventing its lines from bending and warping the hull.
- Minimal Contact with Hard Surfaces: Hard, flat surfaces are the ‘kryptonite’ of kayaks. They are an ingredient for all kinds of scratches and dents. Mounting your kayak to a wall eliminates this vulnerability and allow you to keep it in a ‘spick and span’ condition for longer.
- Simple: Unlike other kayak storage solutions, wall mounts are easy to install, and mounting/unmounting takes a few seconds/minutes.
Consideration Before Mounting your Kayak – Types of Kayak Wall Mounts
If you’re planning to mount your kayak to a wall, you’ll have to make a few considerations for a seamless experience. How heavy is your kayak? How far can you stretch your budget? And where is your storage space (inside or outside)?
Depending on your unique needs, you have two main kayak wall mount options available:
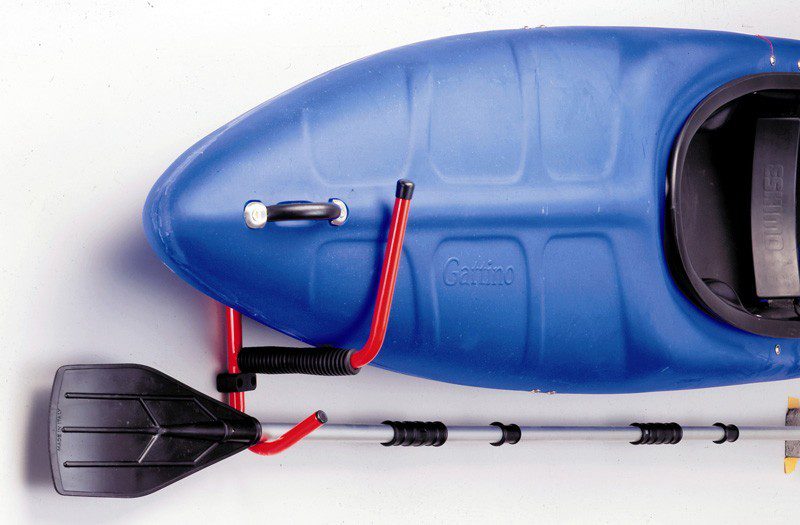
- Slings: With a sling-type cradle, you suspend your kayak by securing it through loops. Slings come in handy when you’re looking to maximize your storage area (i.e., no parts sticking out), store more items (e.g., you can slide a paddle into the loop), and it’s secure. PS: See this video for an illustration. Check out the Railblaza Starport Wall Sling on our website.
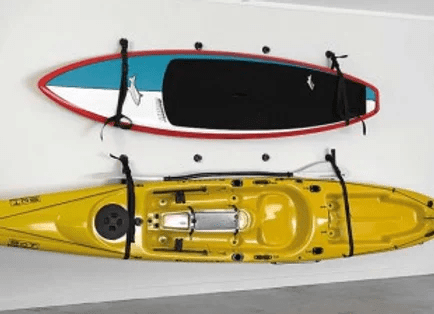
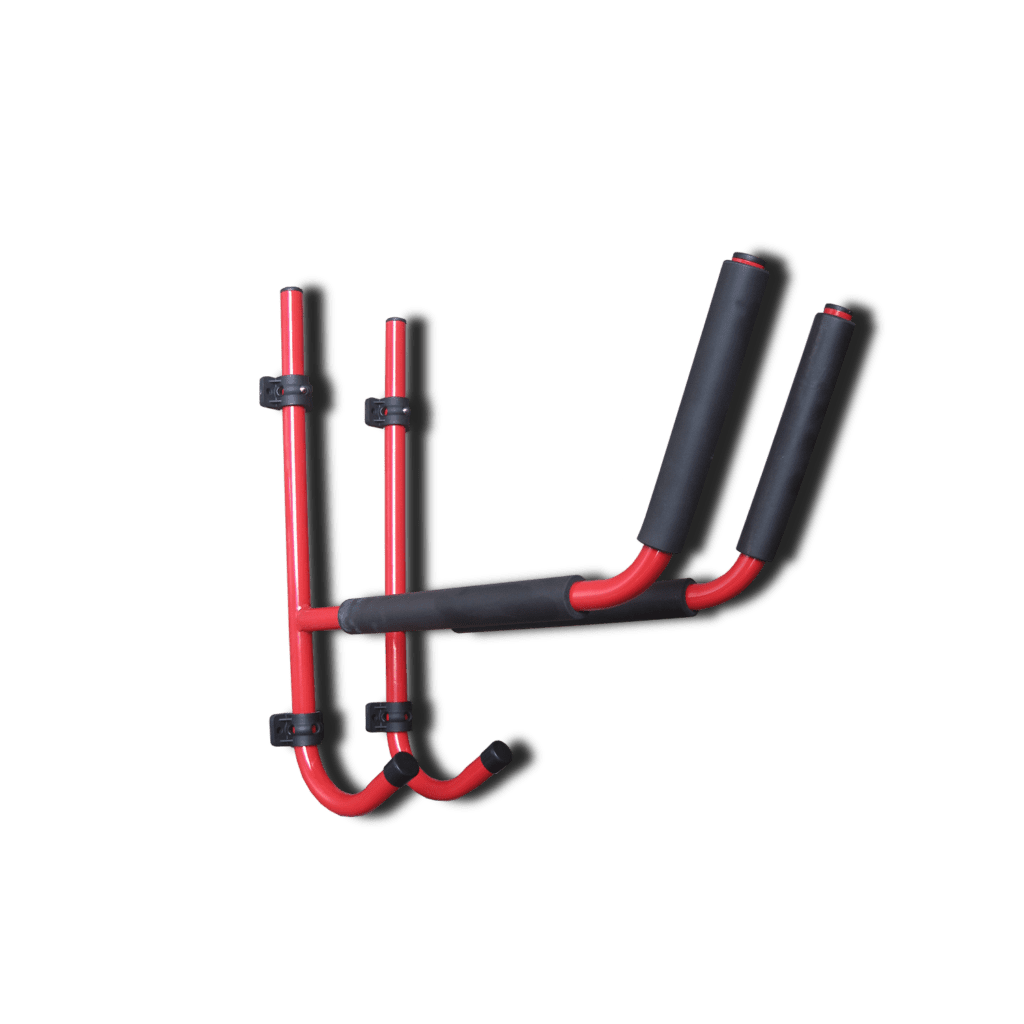
- Hooks/Brackets: As you can guess, the kayak is placed gently on padded brackets/hooks installed into a wall. Bracket-type systems tend to have a higher weight capacity and a higher price tag than slings. Or you can make a homemade version for less but the craftsmanship is then down to the builder.
How to Mount your Kayak to a Wall
Finding the right kayak wall mount is only one facet of the whole equation. Failure to install the rack properly leaves your wall, the kayak, and whatever is below at risk of damage. The good thing is that most kayak wall mounts come with instructions from the manufactures. But if not, here’s a quick guide:
STEP 1: Prepping the Storage Area
First things first; do you have a wall that is big enough and convenient for the storage of your kayak? The general rule of thumb is to measure the length of the kayak (plus a few extra inches for good measure) and match it to a relevant wall.
You can store it anywhere; including the shed, basement, garage, or even your bedroom (*if your partner is okay with it). But ensure the temperature and humidity are controlled—preferably indoors away from sunlight.
STEP 2: Clean your Kayak
Grab a mild all-purpose cleaner and sponge down your kayak’s interior and exterior hull. The idea is to remove residue, dirt, or potentially corrosive substances. Next, dry the kayak to ward off mildew/mold and degradation of the surface. After this, you can cover your kayak to protect it from the elements.
STEP 3: Install the Wall Mounts
Space; check! Kayak, check! The next step is to install your storage unit. For the sling-type system, drill holes for the eyebolts on ceiling rafters or wall studs—ensuring the distance between them is approximately a third of the kayak’s length. Screw in the eye bolt into the drilled hole and insert the sling suspension system.
STEP 4: Hang the Kayak
Place the kayak horizontally with the cockpit facing away from the wall. Make sure the kayak is perfectly centered and not tilting to either side (i.e., straps should be just outside the cockpit and equidistant to each end). Aaaand…you’re done.
Now, hit the water and come home to easy, secure kayak storage—repeating the process over and over for years!
Links to wall mounting systems:
- https://ritzmarine.com/product-page/riber-heavy-duty-wall-mount
- https://ritzmarine.com/product-page/railblaza-star-port-wall-sling
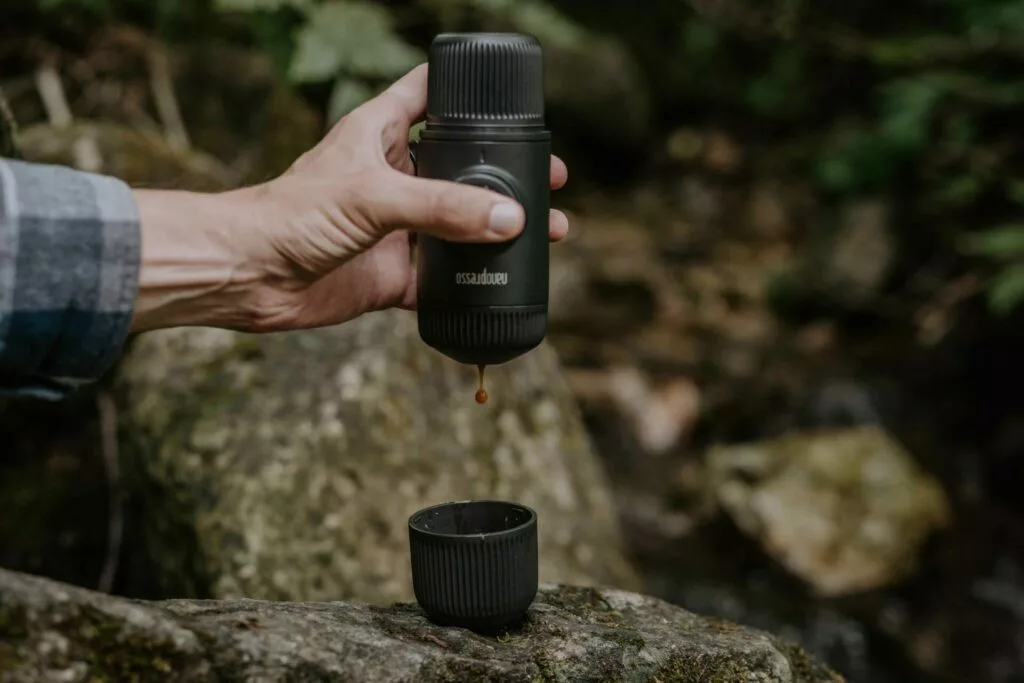
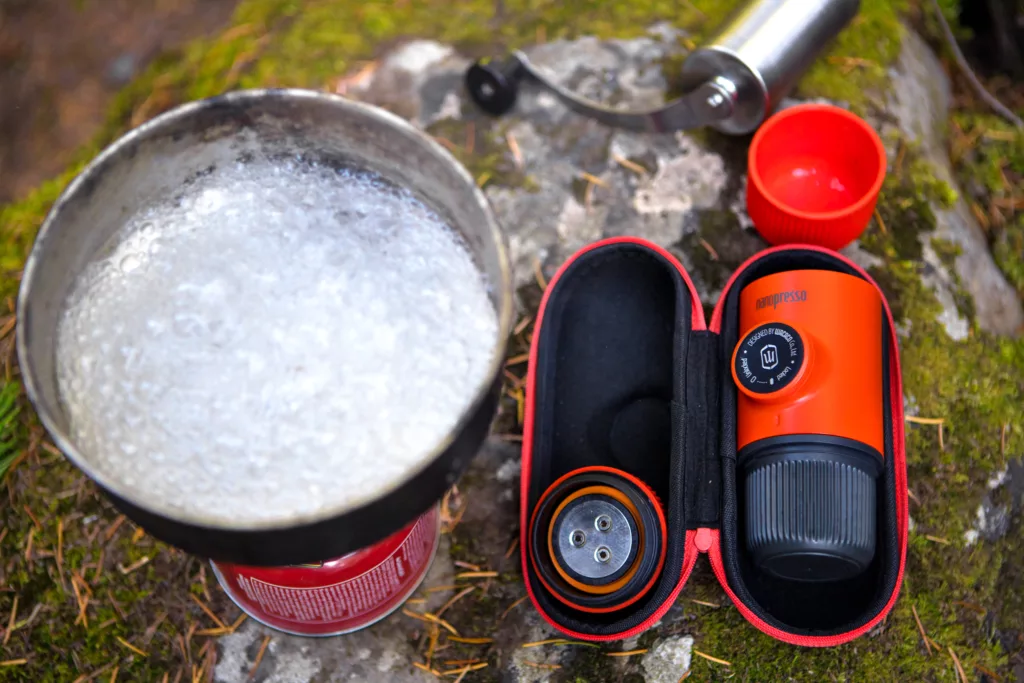

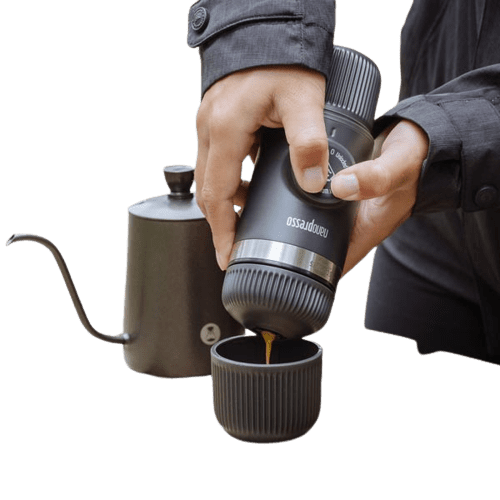
The Wacaco Nanopresso is a portable espresso maker that promises to deliver what a moka pot or Aeropress fail to achieve – real crema. This simple, hand-powered espresso maker is one of my favorite ways to get a caffeine fix on the go. It’s small enough to fit in a backpack, hand bag or even fanny pack and makes great-tasting coffee by manually building up pressure via a spring loaded pump. It’s easy to use, it reaches a maximum pressure of 18 bar, but does require some practice in order to get the best possible results from it.
Nanopresso Design and Capacity
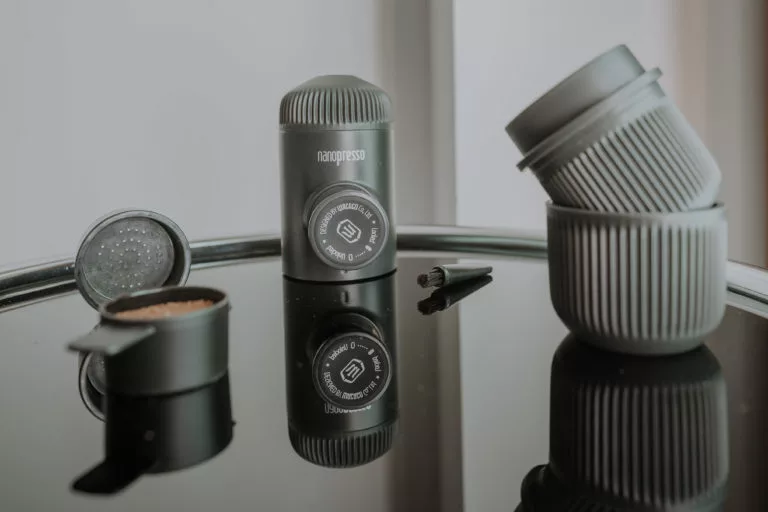
The Wacaco Nanopresso is a compact device made of polypropylene plastic and designed to resist high temperatures and pressure.
It consists of 7 parts, including a little scoop and brush. The water tank holds 80 ml/2.7 oz of water and the filter basket can hold 8 grams/0.3 oz of ground coffee. If you’re brewing with a brew ratio of 1:2, it’ll produce 16 grams of espresso. The Nanopresso is a lightweight with only 336 grams to its name. The small espresso cup is actually attached to the water tank, which can be pulled off. Efficiency at its finest. It comes with a travel case for you to store all parts in one place.
How to Use the Wacaco Nanopresso
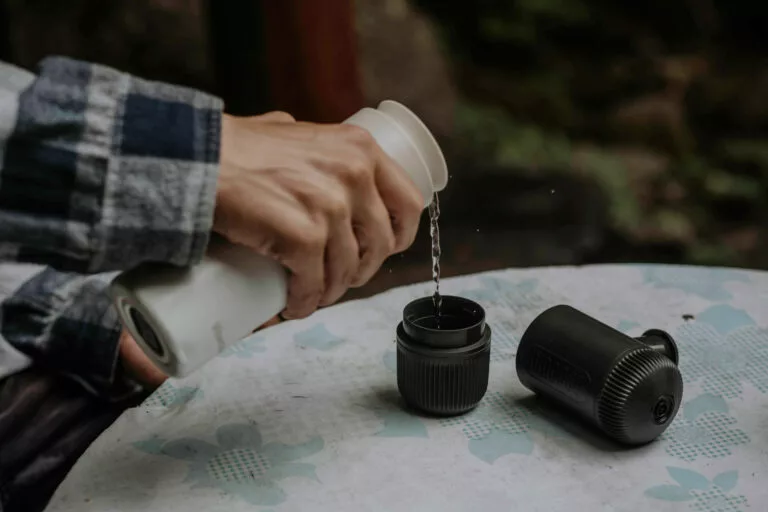
To kickstart your brew, fill the water tank of your device with hot water and pump several times until completely flushed into a cup. This pre-brewing cycle preheats both the Nanopresso and your drinking vessel.

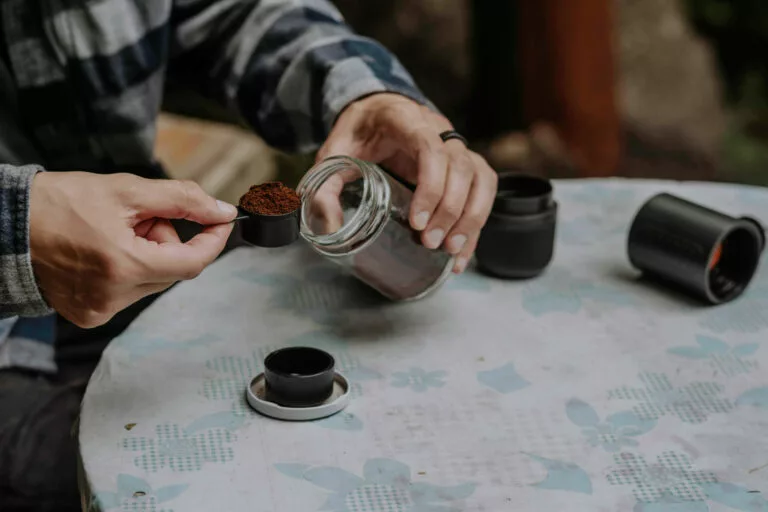
Fill the filter basket with freshly ground coffee. This can be a bit finicky, unless you fill up the measuring spoon, put the filter basket on top and then turn it to catch the coffee grounds in the basket. Slightly tamp the coffee grounds using the measuring spoon. I sometimes add an extra gram here and tamp again to get to 9 grams/0.31 oz input. Put the filter basket underneath the portafilter and screw it onto the main body.
Fill the tank once more with water fresh off the boil until reaching the mark and tightly attach it to the body.
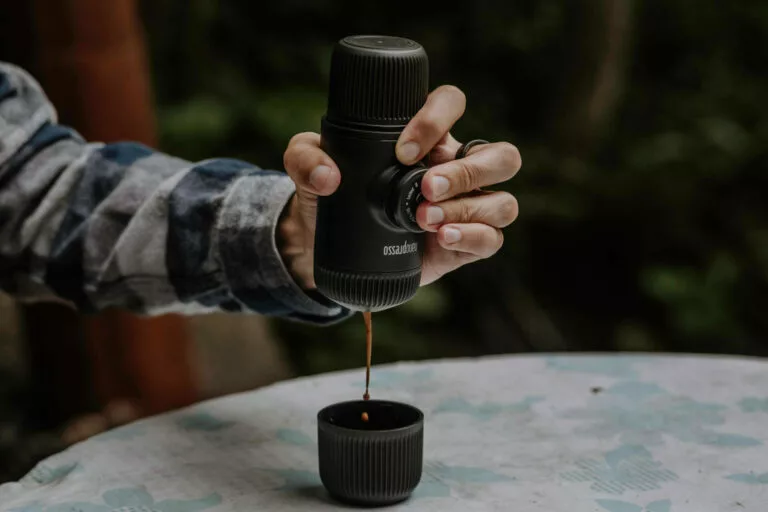

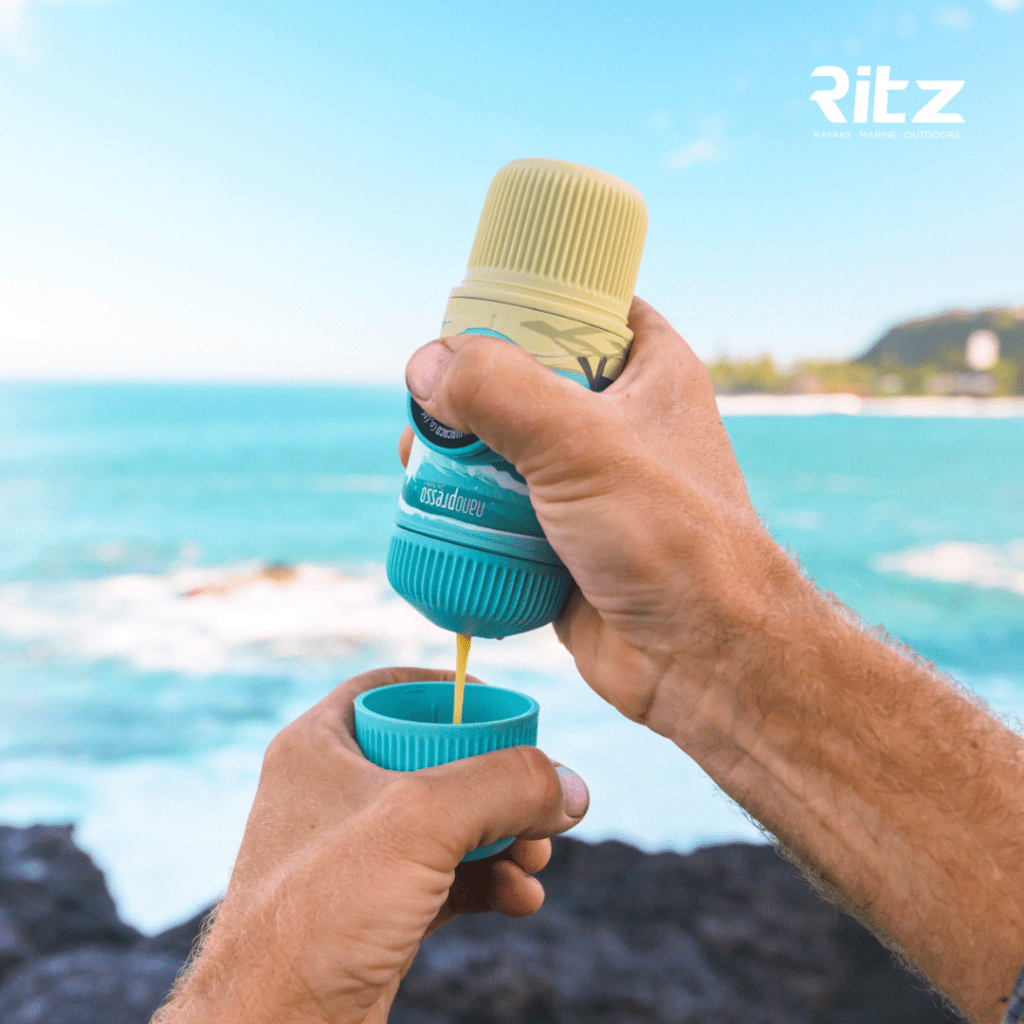
Release the piston, hold the Nanopresso over a cup and pump it five to six times for pre-infusion. Wait for 10 seconds before continuing to pump once per second. Use a coffee scale for accuracy and pump until the desired output landed in your cup. For me this is mostly an additional 10 to 11 pumps after preinfusion. You should see a nice crema on top.
Carefully open the water tank to discard the excess water or use it to top up your espresso. Discard the coffee grounds after the device cooled down and thoroughly rinse all parts.
Barista Kit for Nanopresso
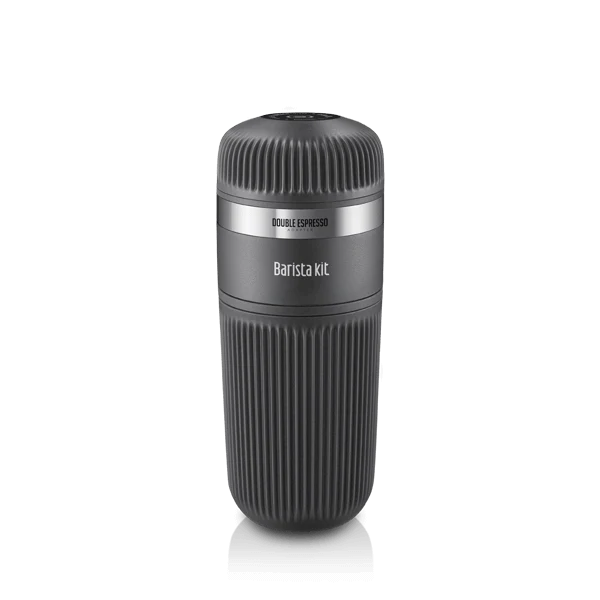
If the espresso output of your Nanopresso leaves you craving for more, then the Barista Kit is your answer. It comes with all the accessories needed for a double espresso, including a 140 ml/4.73 oz water tank with a cup attached to it, two filter baskets with max 16 gram capacity, one filter basket with max 8 gram capacity, a tamper and a double espresso adapter ring.
To brew a double espresso, simply remove the portafilter from the Nanopresso, screw the adapter ring on and fill the filter basket for double espresso with ground coffee.
Screw the portafilter on and start pumping. Thanks to the increased water capacity and the extra filter baskets you can pop several baskets in and out in a row to increase your output.
Can You Use Pods With Nanopresso?
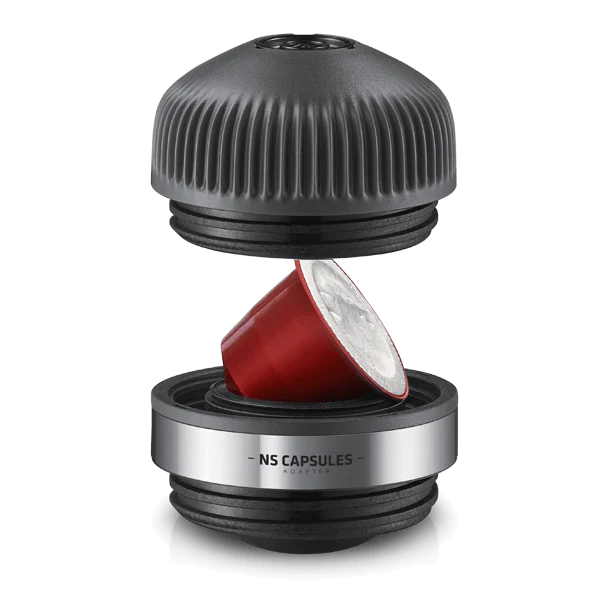
The NS Capsules adapter for Nanopresso allows you to use NS capsules for a quick and convenient caffeine fix. All you need is a compatible capsule and hot water to prepare your shot of espresso without very little room for error. This setup is ideal for when you’re on the road, in a hurry or simply don’t have space to carry a grinder and coffee beans.
To use it, simply unscrew the top filter head with the filter basket and set aside. Pop the pod basket into the Nanopresso and add a compatible capsule, foil facing up, then screw the head piece on tightly. Fill the tank with water fresh off the boil until the little ridge line. Time to start pumping. That’s it!
Some FINAL Key Features in case you’re still in doubt!
✅ Espresso Anytime, Anywhere: Enjoy the rich and bold flavors of espresso wherever you are – at home, in the office, or on your outdoor adventures.
✅ Compact & Portable: This sleek and lightweight device is a true coffee companion, fitting in your bag or backpack effortlessly.
✅ Hand-Powered: No need for electricity! Just use hot water and your favourite coffee grounds for a perfect shot of espresso.
✅ Exceptional Quality: Wacaco’s espresso machine delivers the same great taste as your favourite coffee shop, without the hassle.
Did you ever find yourself wanting a particular product from one of the many kayaking brands such as Palm, Hiko, Crewsaver, YAK, Aquadesign, Gumotex, Epic Kayaks, Perception, NRS which was out of stock and had long waiting times? You now have access to thousands of quality products at your fingertips.
We came up with a system where we inform our esteemed clients before placing an order from any of our brands. This allows them (you) to submit an order along with ours to make sure you don’t miss out on your desired product.
No matter how small your order is, combined with our larger order we make sure you save on shipping costs. Win-Win for everyone! Be it a particular shoes size, or specific PFD colour, we’ve got you covered!
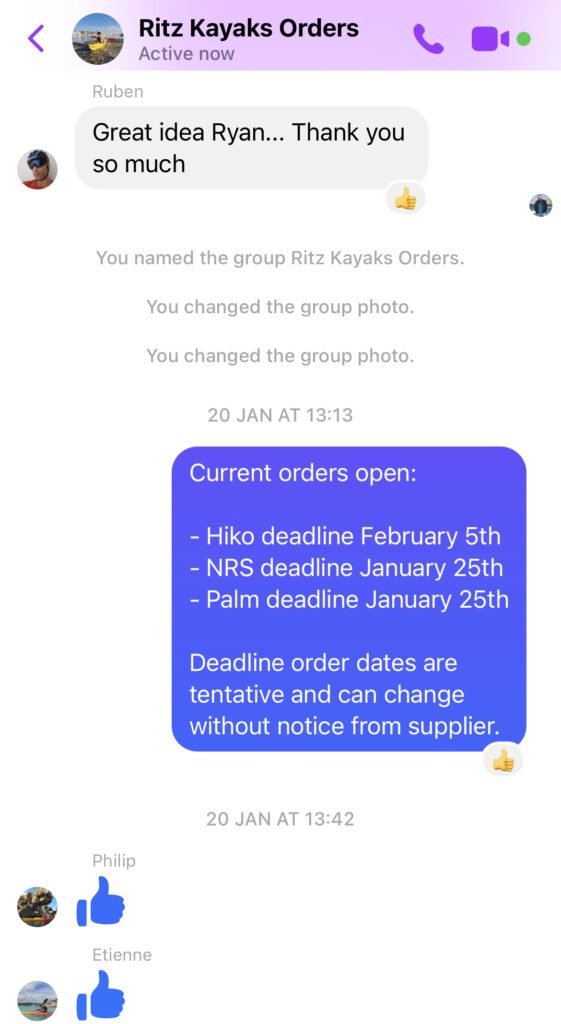
The process is simple.
- A member of our team posts on the Facebook group chat all the current open orders and deadline order dates.
- Group members can send us a private message with their desired order.
- We will inform you of cost and place the order with a deposit.
To be added to this group chat send us a message on our Facebook Page or on Whatsapp (+356 79322092)
Thanks to this group chat you are now able to order, thousands of quality products at your fingertips. Let us know what you think of this idea!
Kayaking is a fantastic outdoor activity that has gained popularity in recent years, and for good reasons. Whether you’re a beginner or an experienced paddler, kayaking offers a wide range of benefits for your physical, mental, and emotional health. In this post, we’ll explore some of the top benefits of kayaking and why you should consider giving it a try.

Low-Impact Exercise
Kayaking is a low-impact exercise that provides a great workout for your upper body, core, and legs. Paddling engages your arm, shoulder, and back muscles, while the twisting motion works your core muscles. Kayaking is an excellent cardiovascular exercise that helps improve your stamina, endurance, and overall fitness. Unlike high-impact activities like running, kayaking puts less stress on your joints, making it a perfect exercise for people with knee or hip problems.
Stress Relief
Kayaking is an excellent way to reduce stress and anxiety. When you’re out on the water, surrounded by nature, you can disconnect from the stressors of everyday life and enjoy the peace and tranquility of your surroundings. The rhythmic motion of paddling can be meditative and help clear your mind, providing a sense of relaxation and calmness.
Improved Mental Health
Kayaking has been shown to have a positive impact on mental health. Being out on the water and surrounded by nature can help reduce symptoms of depression and anxiety. The exercise and fresh air also release endorphins, which can improve mood and reduce stress levels. Kayaking is also a great way to socialize and connect with others, which can be beneficial for overall mental wellbeing.
Connection with Nature
Kayaking provides a unique opportunity to connect with nature and explore the great outdoors. You can observe wildlife, enjoy the scenery, and experience the natural beauty of your surroundings. Kayaking can help you appreciate the environment and develop a deeper understanding of the world around you.
Affordable and Accessible
Kayaking is an affordable and accessible activity that can be enjoyed by people of all ages and skill levels. You can rent kayaks from local outfitters or purchase your own, depending on your preference. Kayaking can be done on lakes, rivers, and even in the ocean, making it a versatile activity that can be enjoyed in a variety of locations.
At Ritz Kayaks, we stock a wide range of kayaks and accessories for all your needs. From sea kayaks, sit on top kayaks, two-person kayaks, inflatable, fishing, surfski, SUPs and accessories in stock for you to choose from!
We import top brands such as Perception, Wavesport, Galaxy, Zegul and more.
In conclusion, kayaking is an excellent activity that provides numerous benefits for your physical, mental, and emotional health. Whether you’re looking for a low-impact exercise, stress relief, or a connection with nature, kayaking has something to offer. So, grab a paddle and hit the water – you won’t regret it!
Kayaking is statistically one of the world’s safest sports, but any time you throw water into the mix, it’s always better to be safe than sorry! Being prepared with the proper safety equipment is something that every kayaker, new or experienced, is responsible for before they head out.
It’s not just your own safety to take into account, but also the safety of everyone in your group and the rescue workers who will be dispatched in the event of an emergency. Be sure to factor in the proper safety gear into your budget when you buy a kayak!
Not sure what kayaking safety equipment you need?
Here are some of our top suggestions for kayak safety gear to bring on every paddling trip.
- The Right Kayak
Buy from a trusted manufacturer that adheres to the latest safety standards and will offer support on how to choose the right kayak for your skill level. It can be dangerous out on the water in a kayak meant for an experienced paddler when you’re just starting out. There are many different types of kayaks for many different purposes, so ask for advice from an expert at your local kayak retailer if you’re not sure which one is right for you!
- Paddle
Choose the right paddle for your size and the activity you’re going to be doing. Again, ask for help from an expert if you’re unsure what kind of paddle is best for your ability.
Check out our selection of paddles here.
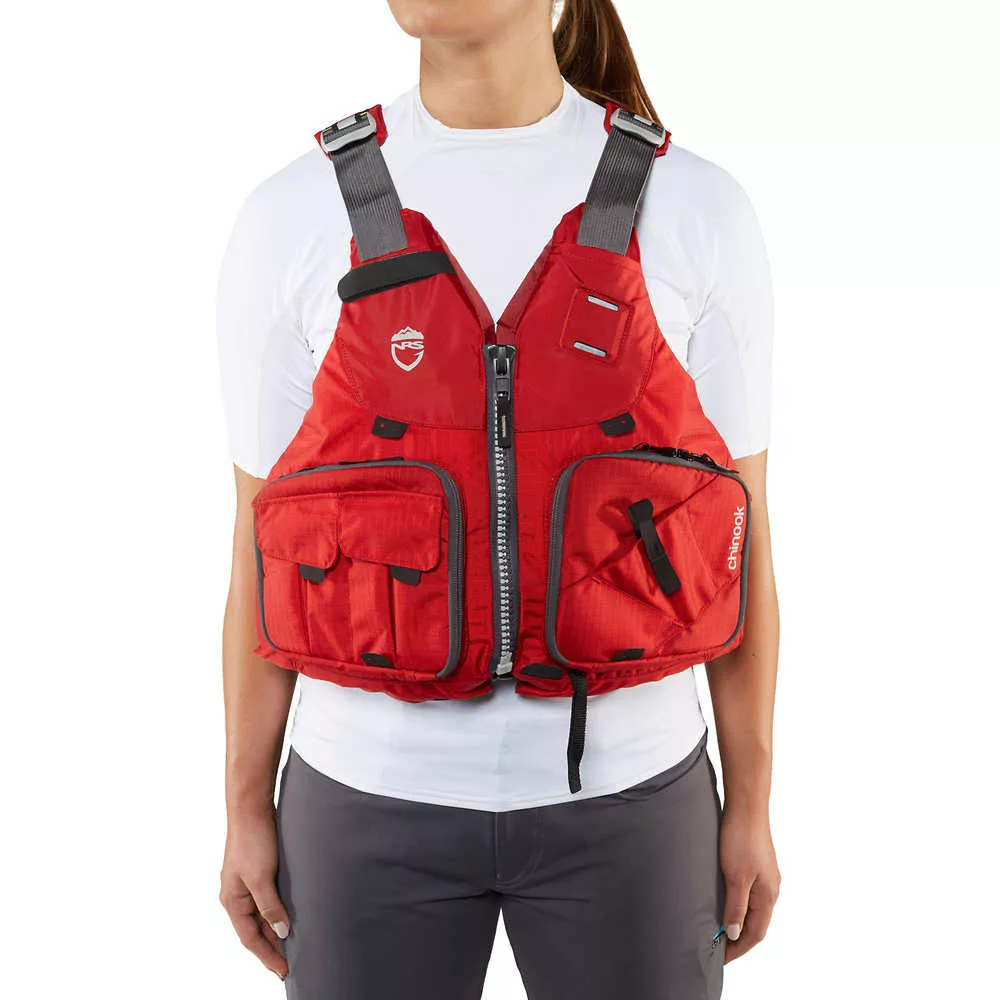
- PFD
This piece of kit is absolutely essential. Your PFD must fit properly, and you must actually wear it! It’s no use to you if you’ve capsized in the water and your PFD is in your boat. Search for kayak-specific PFDs that are designed to give you plenty of movement and not feel too bulky so you can paddle freely.
View our selection of kayaking PFDs here.
- First Aid Kit
Comes in handy as an initial fix if anyone in your group suffers an injury, from small cuts to more serious situations. Boating-specific first aid kits are available that will include waterproof bandages and come in a water-tight bag or box. If you’re not familiar with basic first aid, consider taking a course or make sure that someone in your group is trained in case of an emergency. Keep the first aid kit in an accessible spot in your kayak so it can be reached quickly.
- Dry Bag w/ Cell Phone, Radio, Map, ID etc.
Fasten your dry bag securely to your kayak and keep all the important items you don’t want getting wet or lost securely in here. It is also super important that your phone is in a suitable pouch with a higher iPX rating than your bag!
- Bilge Pump
Kayak bilge pumps are a great tool to keep with you on the water to help you get rid of any standing water you’ve taken on. It’s important to have them and know how to use them in case of an emergency and to ensure you’re able to paddle smoothly without any extra weight holding you back.
- Sprayskirt
Sprayskirts are a piece of equipment worn by the kayaker that creates a watertight seal around the cockpit and prevents water from entering the kayak. You should consider purchasing a sprayskirt if you intend to kayak in conditions where the water is rough

Nobody wants to get in an accident, but by being properly prepared you greatly minimize the chances of getting into real trouble. Keep this essential kayaking safety equipment guide with you and you’re all set to stay safe on the water!